Setting Up a Mail Server with Virtualmin: Step-by-Step
When it comes to managing your own email communication, the idea of setting up a mail server might sound daunting. Perhaps you’ve experienced the limitations of using popular email service providers—cluttered inboxes, intrusive ads, or the nagging feeling of not being in complete control of your data. If this resonates, you’re not alone. Many individuals and small businesses are looking for a more personal and secure way to handle emails.
Fortunately, with the right tools and guidance, you can take charge of your own email communications right from the comfort of your home or server. Today, we’re diving into how to set up a mail server using Virtualmin, a powerful control panel that simplifies server management. Whether you’re a tech enthusiast embarking on a new journey or a small business owner wanting to bolster your communication security, this guide will walk you through the process step by step.
Feel overwhelmed by the complexities of server configurations and command lines? Don’t worry! Think of setting up your mail server as piecing together a puzzle. It can look intimidating at first, but with each step, you’ll see the big picture forming. So grab your coffee, and let’s get started!
Understanding Virtualmin
Virtualmin is an open-source web control panel designed to manage virtual hosts and websites on a dedicated server or VPS (Virtual Private Server). It provides a user-friendly interface from which you can handle tasks ranging from managing databases to setting up email servers. It’s like having a remote control for your server, making it much easier to navigate the sometimes murky waters of server management.
Why Choose Virtualmin?
- User-Friendly Interface: You don’t need to be a tech guru to figure it out.
- Comprehensive Features: Manage domains, databases, and email all in one place.
- Community Support: With a large user base, getting help and resources is straightforward.
- Cost-Effective: Virtualmin is open-source, meaning you can utilize it without licensing fees.
Preparing Your Server
Before diving into the setup, ensure your server meets the following requirements:
- Operating System: Virtualmin works best with Debian or CentOS, but it also supports various Linux distributions.
- Server Access: You must have root access to your server, which allows you to install software and make configurations.
- Domain Name: You need a registered domain name to configure your email settings properly.
Installing Virtualmin
The installation process for Virtualmin is fairly straightforward. Here’s how:
- Connect to your server using SSH. You can use tools like PuTTY (for Windows) or Terminal (for Mac).
- Run the following command to download the installation script:
- Next, run the script:
- Follow the prompts on the screen; the script will install all necessary components.
wget http://software.virtualmin.com/gpl/scripts/install.shsudo bash install.sh
Once the installation is complete, navigate to your Virtualmin panel by entering https://your-server-ip:10000 in your web browser and log in with your root credentials.
Setting Up Your Mail Server
Now that you have Virtualmin set up let’s get to the exciting part: configuring your mail server.
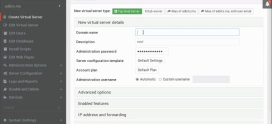
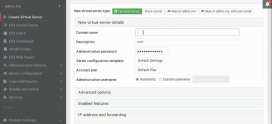
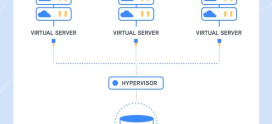
Step 1: Create a New Virtual Server
- In the Virtualmin interface, click on “Create Virtual Server.”
- Enter your domain name and configure the other settings according to your preferences.
- Make sure to enable the email feature while creating the virtual server.
Step 2: Configure Mail Settings
Now, let’s fine-tune your email settings:
- Go to “Server Configuration” within your newly created virtual server.
- Select “Mail Server Settings.” Here, you can adjust settings like spam filtering and email forwarding.
- Make sure to set up the SMTP and POP3/IMAP settings as needed. These protocols handle sending and receiving emails.
Step 3: DNS Records
A crucial step in setting up your mail server involves configuring DNS records.
- Log into your domain registrar’s dashboard.
- Create an MX record pointing to your mail server. This informs the internet where to deliver emails intended for your domain.
- Don’t forget to set up SPF and DKIM records to protect against spoofing and improve your email deliverability.
Securing Your Mail Server
Once you’ve set up your mail server, security must be a primary concern. Think of it as locking your front door when you leave home. Here are steps you can take:
Use SSL/TLS
Implementing SSL/TLS encryption helps secure email transmissions. You can obtain certificates through services like Let’s Encrypt, which provides free SSL certificates.
Keep Software Updated
Make it a habit to regularly update your Virtualmin and server applications. This practice will patch any vulnerabilities and keep your server safe.
Monitor Logs
Regularly monitor mail logs for any suspicious activity. You can find logs in the “Mail Logs” section within Virtualmin. Think of it as your email security patrol.
Testing Your Mail Server
After setting everything up, it’s time to test your configuration:
- Send a test email to your new mail address.
- Check if you can receive emails from external addresses.
- Utilize tools like mxtoolbox.com to verify that your DNS records are properly configured and that your server isn’t on any email blocklists.
Case Study: A Small Business Success
Meet Alex, a small business owner who needed a reliable email system. After struggling with free email services, he decided to set up his mail server using Virtualmin.
Alex began by following this guide, ensuring he had the right server setup and domain name. Within a few hours, he had his server running, and everything was secure. Not only did he save money by not relying on paid email services, but his clients appreciated the professional nature of his custom email addresses.
This transformation increased his credibility in the market and allowed him to communicate without the hassles previously experienced. Alex’s success story illustrates how taking control of your email can significantly enhance business operations.
FAQs
What are the initial costs associated with setting up a mail server?
The primary costs involve acquiring a VPS or dedicated server and your domain name. If you go for a managed service, price varies depending on the service provider.
Is it difficult to set up a mail server with Virtualmin?
No, Virtualmin is designed to simplify the process. As long as you follow the steps and have basic server knowledge, you should find it manageable.
How can I ensure my emails don’t end up in spam folders?
Setting up SPF and DKIM records, using a reputable email service, and monitoring your sending behaviors help improve your email deliverability.
Do I need technical expertise to manage a mail server?
While some technical knowledge is beneficial, Virtualmin helps bridge that gap. As you learn, you’ll become more comfortable handling your mail server.
Can I set up multiple domains on one mail server?
Yes, Virtualmin allows you to set up multiple domains on a single mail server. You can create separate virtual servers for each domain and manage their email accounts independently, which is ideal for businesses with multiple brand identities or project-specific communications.


