How to Perform Database Backups and Restorations with phpMyAdmin in cPanel
Have you ever stressed over losing invaluable data from your website? You’re not alone. The thought of a technical glitch, accidental deletion, or even malicious attacks can certainly keep most website owners awake at night. But breathe easy! Understanding how to perform database backups and restorations can save you a lot of heartache down the line.
Consider your database as a treasure chest, filled with your precious data. If something were to fracture that chest, wouldn’t you want a way to restore its contents easily? That’s where phpMyAdmin in cPanel comes in, providing a straightforward and user-friendly way to manage your database. Today, we will walk you through the process of backing up and restoring your database using phpMyAdmin, with easy-to-follow steps tailored just for you.
So, let’s dive in together and eliminate those worries about losing your data. By the end of this article, you’ll feel confident and empowered to manage your database like a pro!
What is phpMyAdmin?
Before jumping into the nitty-gritty, let’s clarify what phpMyAdmin actually is. Simply put, phpMyAdmin is a web-based application that makes managing MySQL databases a breeze. It’s like having a virtual toolbox at your fingertips, allowing you to perform various database operations with just a few clicks. From creating databases to running queries and, most importantly for us today, backing up and restoring databases, phpMyAdmin does it all.
Why Back Up Your Database?
Backing up your database might feel tedious, but think of it as an insurance policy for your digital data. Here are some compelling reasons why you should prioritize database backups:
- Data Loss Prevention: Whether it’s due to human error or server crashes, a backup ensures you won’t lose important data.
- Website Recovery: If your website gets hacked, you can restore it to a previous state before the attack.
- Peace of Mind: Knowing that you have a recent backup makes tackling technical problems much less stressful.
Getting Started with cPanel and phpMyAdmin
If you’ve ever logged into cPanel before, you’ll find that accessing phpMyAdmin is quite straightforward. Here’s how to get started:
- Log into your cPanel account.
- Scroll down to the “Databases” section.
- Click on the “phpMyAdmin” icon.
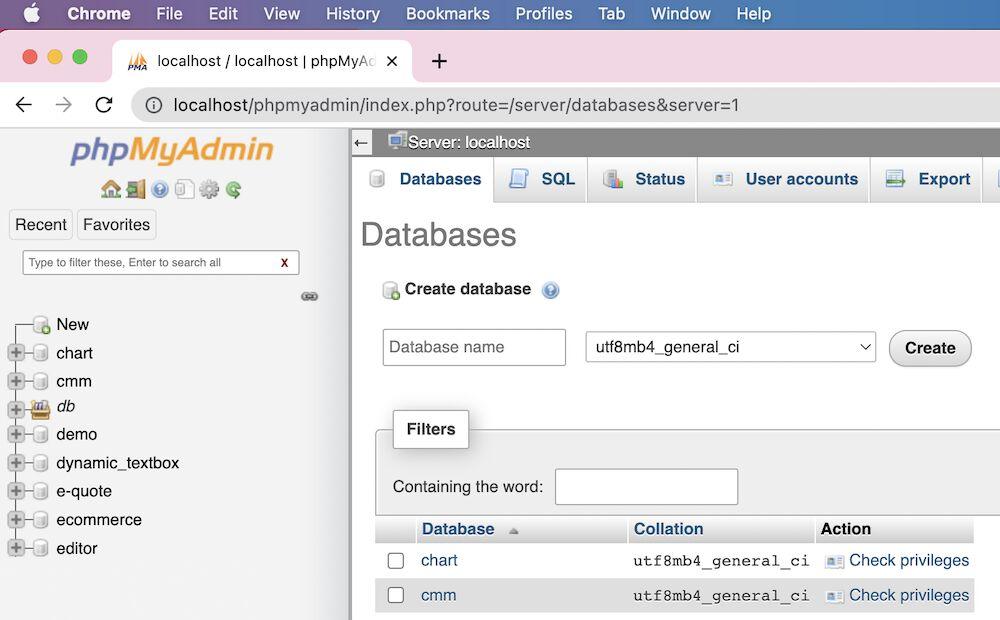
Once you’re in phpMyAdmin, you’ll see a list of your databases on the left side panel. Isn’t it nice to know you’re just a few clicks away from ensuring your data is safe?
How to Back Up Your Database
Backing up your database may sound daunting, but with phpMyAdmin, it’s as easy as pie! Here’s a step-by-step guide:
Step 1: Select Your Database
In phpMyAdmin, locate your database from the left sidebar. Click on it, and you’ll see a list of tables that comprise your database.
Step 2: Export Your Database
Now that you’ve selected your database, it’s time to export it:
- Look for the “Export” option in the top menu.
- You’ll be prompted to choose your export method. For a quick backup, select “Quick.” For more options, you can select “Custom” to choose specific tables.
- Click on the “Go” button, and your database will be downloaded as a .sql file to your device.
And voilà! You have successfully backed up your database! Keep that file safe, like a hidden treasure.
How to Restore Your Database
Now, let’s dive into the backup recovery process. You never know when you might need to use this knowledge! Here are the steps for restoring your database from a backup:
Step 1: Navigate to phpMyAdmin
Just like before, log into cPanel and access phpMyAdmin to get started.
Step 2: Select Your Database to Restore
Before restoring, you need to ensure that you select the correct database where you want to import the backup. If you need to create a new database for restoration, click on “Databases” and create one first.
Step 3: Import Your Backup
Here’s how to bring your data back:
- With the database selected, go to the “Import” tab in the top menu.
- Click on the “Choose File” button to upload your backup .sql file.
- Click on the “Go” button to start the import process.
It may take a few moments depending on the backup size, but once it finishes, your database should be restored seamlessly!
Best Practices for Database Management
Feeling overwhelmed? Don’t worry; even seasoned website owners follow best practices to ensure smooth sailing with their databases. Here are a few tips to keep in mind:
- Regular Backups: Aim to back up your database weekly or more frequently, based on your data changes.
- Organize Your Backups: Store backups in a separate location like cloud storage or external drives, and date them.
- Test Restorations: Try restoring from a backup periodically to ensure your backup files are effective.
What to Do if You Encounter Errors?
Even with the best precautions, sometimes things can go wrong. If you encounter errors during backup or restoration, don’t panic. Here’s a simple troubleshooting guide:
- Check for a file size limit; if your database is too big, you might need to use compressed formats.
- Double-check that you have selected the correct database for both backup and restoration.
- Clear browser cache or try using a different browser if you can’t access functionalities.
FAQs
How often should I back up my database?
It’s recommended to back up your database at least once a week or even daily if you’re making frequent changes.
Can I back up multiple databases at once?
Unfortunately, phpMyAdmin does not allow for multiple exports at once. Backups need to be completed one at a time.
If I restore a database, will it overwrite existing data?
Yes, restoring a database will override existing data within that database. Make sure to back up any current data before restoring.
Is it safe to back up my database on my computer?
While it’s convenient, it’s safer to use cloud storage or external drives to minimize risks of loss in case of hardware failure.
What should I do if my backup file is corrupted?
Try obtaining an earlier version of your backup if available. Regular backups help avoid this issue.
Conclusion
Managing your database backups and restorations with phpMyAdmin in cPanel doesn’t have to be a daunting process. Regular backups serve as your safety net, shielding you from unforeseen data loss. Remember to adopt good practices, and before you know it, you’ll be handling your databases like a seasoned pro.
Now that you’re equipped with the knowledge to back up and restore your database, why not start implementing it today? Don’t put off what could save you trouble in the future. Your data deserves to be protected!


